How To Measure Flush Panel Garage Doors For Window Installation
Getting compliments on your home is every homeowner’s dream. Your garage plays a large role in that first impression when having visitors. Adding new garage door windows will take your home to the next level. Today we will show you how to measure your flush panel garage door to install some new windows!
Tools Needed
- Ladder
- Tape Measure
- Painter’s Tape
- Bubble Level
- Marker

What Are Flush Panel Garage Doors?
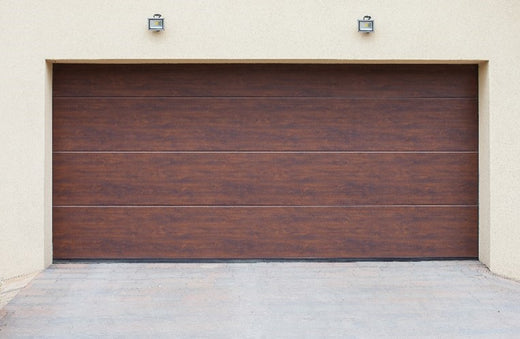
Flush panel garage doors are recognized by their smooth, flat panels. These panels create a clean and modern appearance. Unlike traditional stamped garage doors, flush panel doors have an elegant look. This style makes them a popular choice for modern home builders where simplicity and sleek lines are key design elements.

The key features that allow a flush panel garage door to stand out from the rest is their versatility and customization. Flush panel doors are versatile because they can be constructed from various materials such as steel, aluminum, and wood.
Since there are no pre-made stamps on the door, the customization options are endless. Windows can be placed in many different styles since each flat panel acts as a blank canvas. We will now show you how measuring your panels simplifies the window selection process.
How To Measure Your Exterior and Interior Panels
Now that it’s time to measure your panel, get your measuring tape. Measure the full length and height of your garage door panel. It is important to measure the height and length of each panel so that you can see how many windows will fit on your garage door.

When measuring your garage door panels, focus only on the exposed surfaces. Weatherstripping along the sides and top of the garage door can conceal a few inches, so it’s important to avoid including these areas in your measurements.

After measuring the exterior panels, apply these measurements to the interior of the door. Interior obstructions such as metal caps or structural elements on each panel can interfere with window placement and cutouts. These obstructions cannot be cut into, so accurate interior measurements are essential.
To ensure that the same spot is measured on both the exterior and interior, determine how far your window cutout will be from the panel joint and the garage door jamb. Use these reference points to align your interior measurements with your exterior ones. This will prepare you to gauge which window size you will buy.
Deciding Which Window Size To Buy
When it comes to the types of windows that can be put on your garage door, there are typically short, intermediate, and long panel windows which vary in length and height. Short panel windows can range between 19 – 20 inches in length, and 12”-15” in height. Intermediate panel windows are 26” inches long, and 24” high. Long panel windows are 40” and 42” inches in length, with 7” and 15” inch heights.

Short, Intermediate, & Long Panel Windows
Using your garage door’s measurements, browse through different window sizes that would fit in each panel. For example, if one of your panel’s length and height is 108” by 24”, then selecting our 741 model garage door window would be a great option for long panels.
These windows are 40 7/8” by 7 15/16” in measurements. This will fit up to two windows per panel horizontally for this type of garage door. New styles for long panels also include windows placed vertically on one side of the garage door.

In order to visualize your window placement, we will need to understand cutout sizes.
Understanding Cutout Size
Adding a new window to your garage door requires patience and precision. The installation process needs exact measurements to place the window frame in a cutout.
The cutout size is one of the most important dimensions when deciding which window to buy. Some windows might have the same frame tip-to-tip size, but will fit different cutout sizes.
On a flush panel garage door, the size of the cutouts determines how many windows you can add and how they’ll look. Larger cutouts will fit larger windows, while smaller ones allow more windows to be placed. Choosing the right size is key to balancing style and function.

Using Painter’s Tape To Visualize Windows
Since sizing is key, let’s use painters tape to visualize the perfect windows for your garage door. Using the previous example for our 741 window, the cutout size is 40 1/16" x 6 1/8".

You will place painter’s tape between your garage door panels to simulate your future look. You may do this on the interior and exterior panels of your garage door. Use the cutout dimensions of your new window to effectively tape. Your bubble level and measuring tape will be helpful for the straightest lines possible.
If you are happy with your placement, it is time to move on to measuring your garage door’s thickness.
Measuring Garage Door Thickness
Next, you will have to raise the garage to measure the thickness of the door. One of the best methods is by using a step-up ladder to measure the very top of your garage door. You will need to open your garage door when doing this. Other methods are explored below that can vary depending on your garage door. The goal is to get the most accurate measurements through the least-obstructed areas on your door.

In the next step, it might be helpful to raise the garage door to a mid-level height. Once your garage door is open and stationary, measure the thickness of the bottom.

You can also measure the thickness of the side of your garage door. You can measure the side by lifting the door and exposing gaps between the hinges. This should be done in case there is a weather seal or track already installed on the bottom of your garage door.

You will need to reference your garage door’s thickness to your new window’s cutout thickness. This is so that the window frame fits securely into the cutout.
Now that you have recorded all your measurements, it is time to select the finishing touches for your new window!
Selecting Your Windows
Now that you have an idea of the window model you’d like, it is time to customize it to your liking. The details in the frame and the glass matter in these final steps. The color of the frame should typically match your garage door’s color. The glass type and finish add the final touches to the perfect window. Let’s explore some of them.
Frame Color
We offer our residential frames in white, sandstone, and black. Frame colors can always be painted to match your garages color. If you decide to paint your frames, you will require PVC adhesion promoter available at any hardware or automotive center.

Glass Type
There are two types of glass to choose from, insulated (double glazed) and single glass. Insulated glass provides extra window pane layers for added energy efficiency. Single glass provides one window pane layer. Depending on your climate, one option might be more cost-effective than the other.
Glass Finish
The type of glass finish comes with different uses. If you like having lot’s of natural light, then clear glass is a good option. Tinted and frosted glass provide more privacy while letting in different levels of light.

And you’re done! Now that you can visualize what your new windows will look like, let’s increase the curb appeal of your home!
Need More Help?
If you are ready to install your windows, make sure to check out our garage door window install guide. Our Customer Service Team is here to assist you with any extra questions!
For updates, news, and exclusive deals, follow us on Facebook, Instagram, and Tiktok. Enjoy your upgraded, weather-tight garage door!


Post Comment