

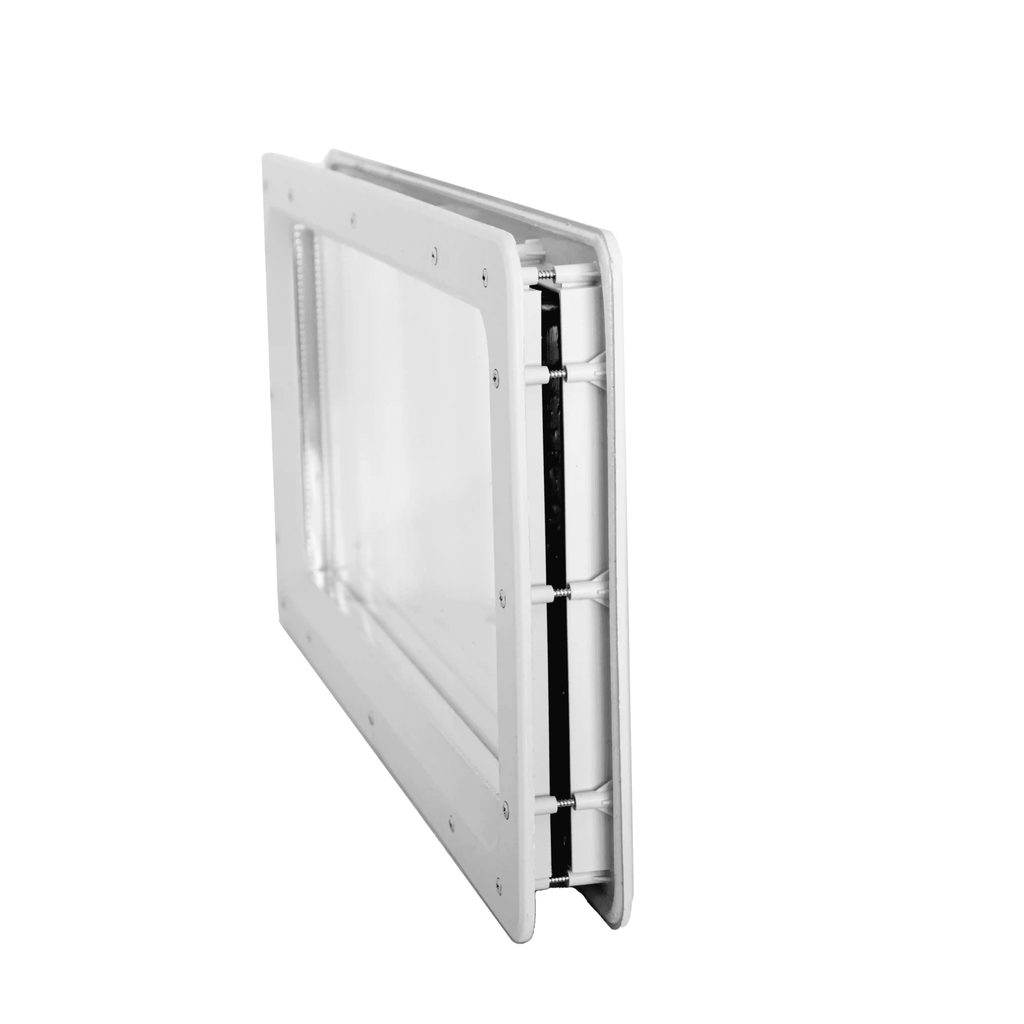


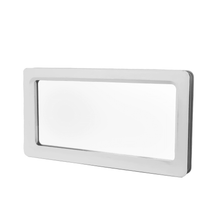


12" x 24" Commercial Garage Door Window
Solid construction suitable for replacing existing windows or new ones with proper cutout. Trusted by contractors and building maintenance professionals. Easy to install and field replaceable. The most popular and versatile window solution that adds natural light and style to any garage.
Features
- Easy to Install: Garage Door Land's Rectangular 12x24 Garage Door Windows feature an easy to install screw in design. With a correct cut out on your garage door it will be as simple as screwing the windows together.
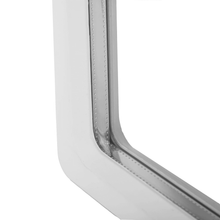
- Weather Resistant: Made to withstand harsh winter climates and heavy rainfall regions. Exclusive technology to prevent fogging between the glass panes.
- Double Glazed & Tempered: Double glazed to prevent fogging between the window panes. You can be sure the cold stays out during the winters lowering your heating cost while allowing natural sunlight into the garage.
Garage Door Window Specifications
- Colors available: Black, White
- Glass Type: Clear Double Glazed Tempered Glass
- For Window Cut out Thickness: 1-3/8", 1-3/4", 2"
- Frame Size: ( Tip to Tip): 25-1/8" x 13-1/8" (638mm x 334mm)
- Cutout Size: 23 7/8" x 11 15/16" (611mm x 305mm)
- Vision Area: 21 11/16" x 9 5/8" (551mm x 245mm)
- Custom Orders Available
Installation guide available in the tab above — simple, standard installation process!
How to Install Field Replaceable Garage Door Windows
Professional-grade garage door window insert kits for residential and commercial applications — consistent sizing trusted by contractors.
Safety First
Of course, installing windows would be exciting but, but it's essential to tread with caution. The process involves certain risks that, if overlooked, can result in accidents or damage. Before you dive in, consider these four critical safety precautions to ensure a smooth and hazard-free experience.
-
Wear Protective Gear: Always wear safety goggles to shield your eyes from dust, debris, or broken glass. Additionally, donning a pair of durable gloves can protect your hands from sharp window edges and heavy materials.
-
Secure the Garage Door: Ensure that the garage door is in the "down" position and disconnected from the automatic opener, if applicable. This prevents any accidental movements which might result in injuries.
-
Use the Right Tools: Utilize the appropriate tools for the job and make sure they are in good working condition. Avoid makeshift solutions as they can lead to accidents or cause damage to the window or door.
-
Work with a Partner: It's advisable to have a second person to help, especially when removing or placing the new window. This not only ensures the job is done efficiently but also provides immediate assistance in case of any unexpected situations or emergencies.
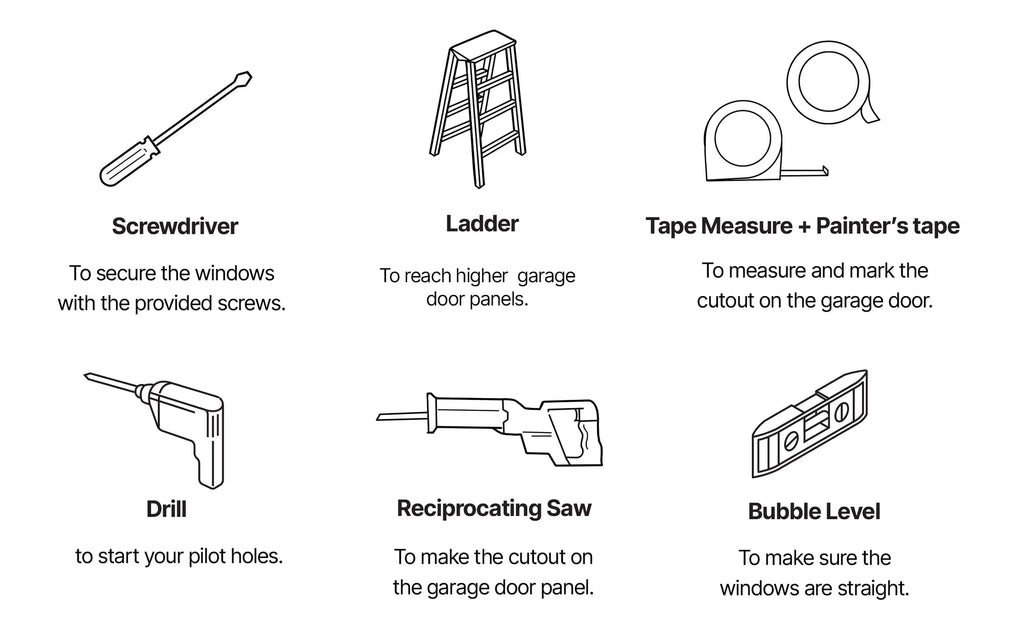
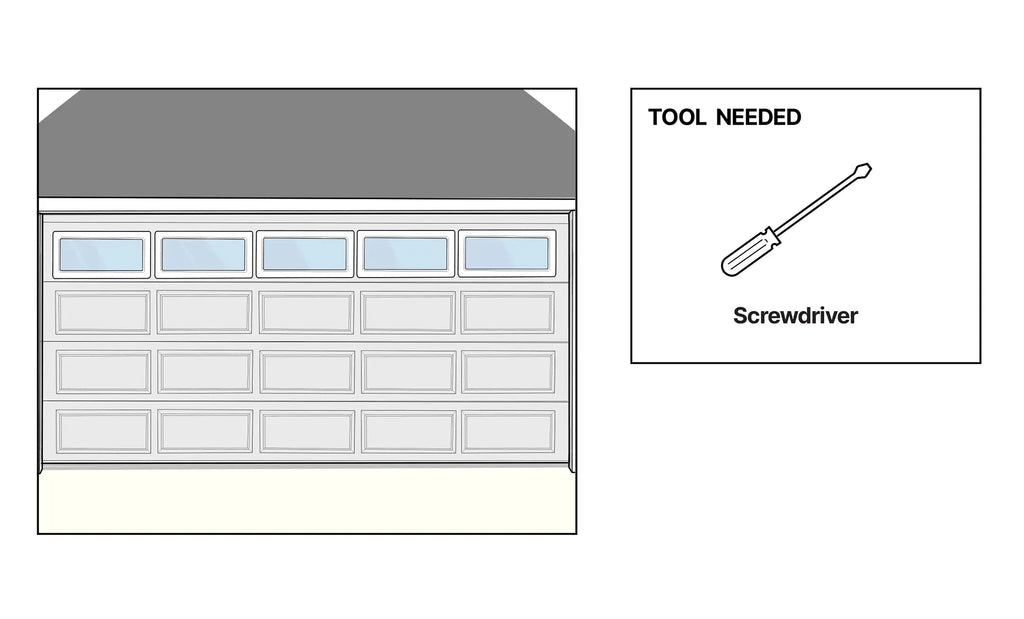
Tools Needed
Once you have your safety needs met, now its time to assemble the tools you'll need. Installing the windows are a simple process and only requires the following tool.
- Screw driver - To secure the windows with the provided screws.
- Ladder - If installing the windows on the upper panels.
- Tape Measure + Painters tape - To measure and mark the cutout on the garage door.
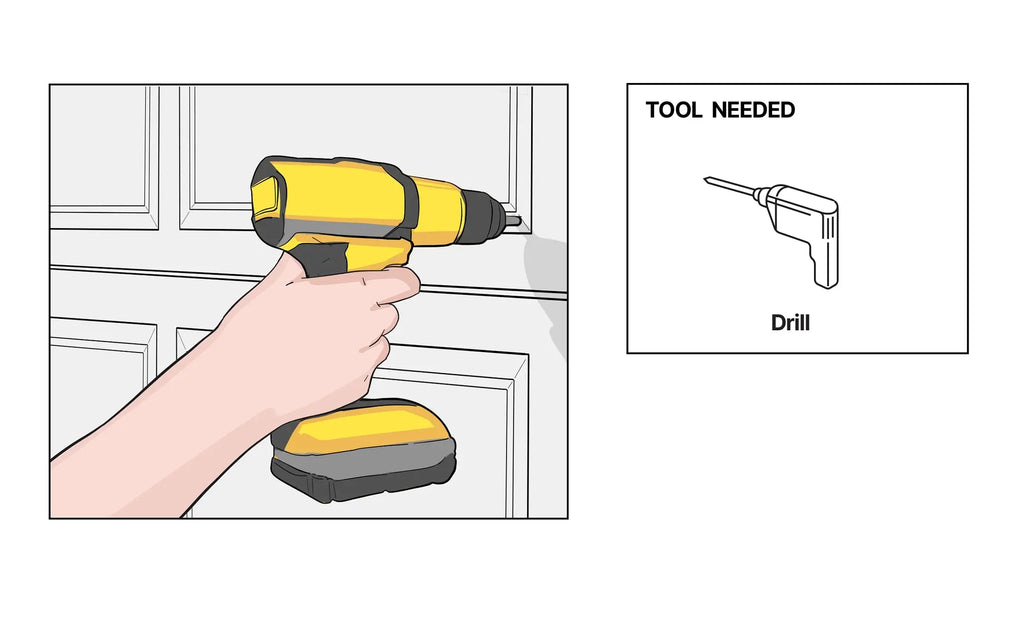
- Drill - to start your pilot holes.
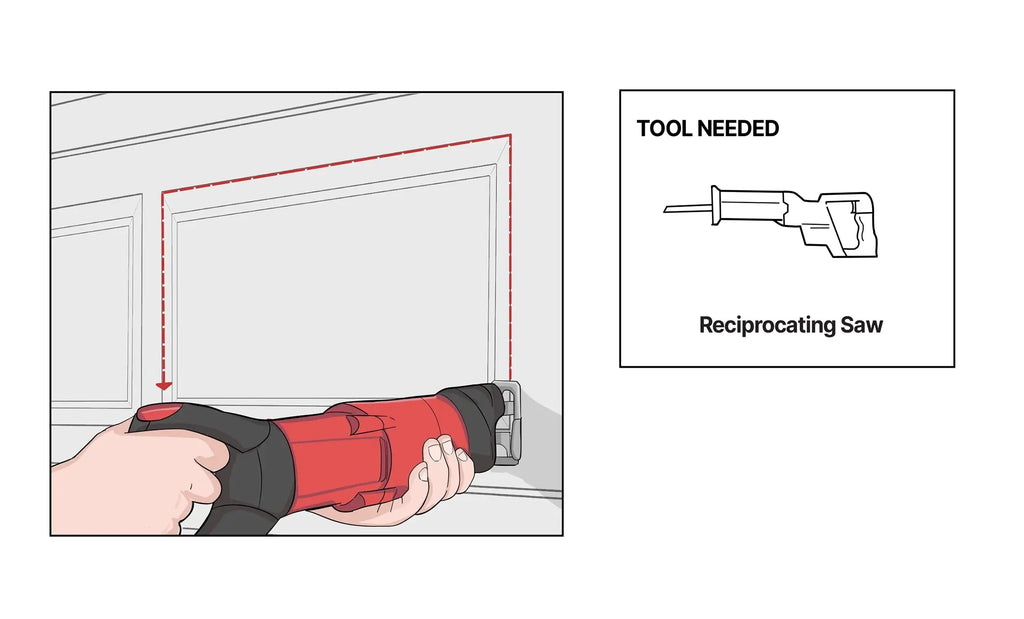
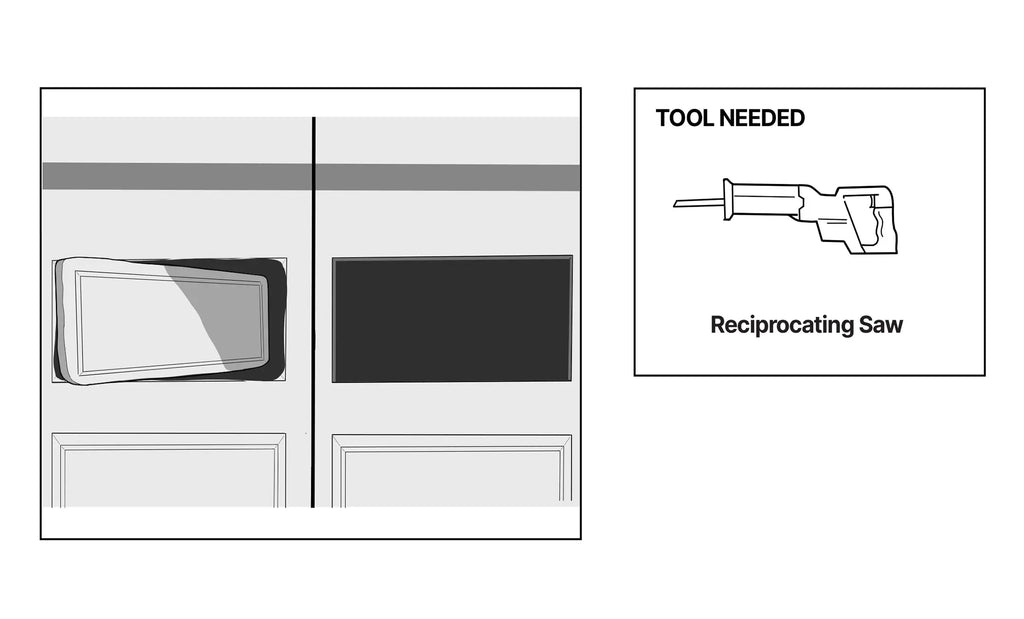
- Reciprocating Saw - To make the cutout on the garage door panel.
- Bubble Level - To make sure the windows are straight
- Adhesion Promoter for Plastic (Optional) - If you plan on painting the polypropylene frames. Can be purchased from your local automotive or home hardware store. Home Depot US or Canadian Tire (CA)
How to Install the Windows
Now that you have all the tools you need (and the second person), it is time to install the windows. Remember the hardest part of the installation is making the cut. Always measure twice and cut once.
*We recommend installing 1 window at a time*
*If you plan on painting the window frames, paint them before installation*
Step 1 - Unboxing the Windows:
Unbox the windows and make sure you have an outer frame, a glass unit, and an inside frame. The inside frame should be the ones with the screw holes. Check the packaging for screws, and preassemble them to make sure everything fits together.
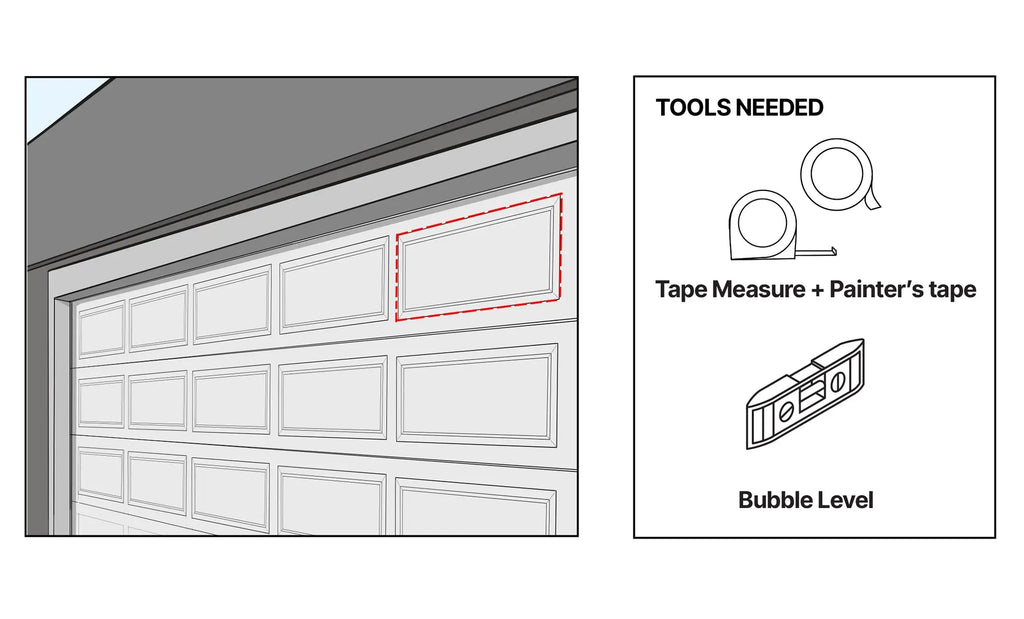
Step 2 - Marking the Cutout:
Using the provided measurements (from the product page, or through customer service) use the tape measure to draw out the cut-out dimensions. It is recommended to use the bubble level and the painter's tape to mark out and make sure each dimension is straight.

Step 3 - Drill Pilot Holes:
Now that you have your dimensions marked out on the garage door. Use your drill to put some pilot holes in your garage door. This way it will make it easier for your reciprocating saw to get started.
Step 4 - Cut the Opening:
Insert your reciprocating saw into a pilot hole and use it to cut along the drawn lines.
Step 5 - Remove Section and Trim:
After completing the initial cut remove the cut out section and trim down and spots you have have missed making sure the cutout is as straight as possible.
Step 6 Install Window (2 People Required):
Once you finished the cutout, place the front frame (one without the screw holes) into the opening. Have the second person hold the outside frame as you go inside the garage to place the glass unit into the opening. Once the glass unit is in place, put the back frame into the opening sandwiching the glass unit between the front frame and back frame. Secure both frames together with the screws provided. The screws should be snug but not overtightened, to allow for thermal expansion.

Step 7 - Repeat Steps :
Now that you finished, the first window stand back and admire your handy work for a little bit. Then repeat steps 2-6 for the other windows.
Enjoy Your Garage Door Windows!
And just like that you revitalized your garage door at a fraction of the cost. Think of those garage windows as more than just a facelift; they're about lighting up spaces and boosting value. With a bit of care and the right tools, you're on your way to a brighter garage. Cheers to your next DIY adventure!